


Life is better in color, and sometimes our imaginations need help. Miniatures, models, tokens, and whatever you happen to use in your Role Playing Games, Skirmish games, and war games always look good when painted. If you’re a Warhammer 40,000 player, then painted armies are even required in tournaments now. Painting minis can seem a daunting task, so I would like to share some basics with you.
The Basics
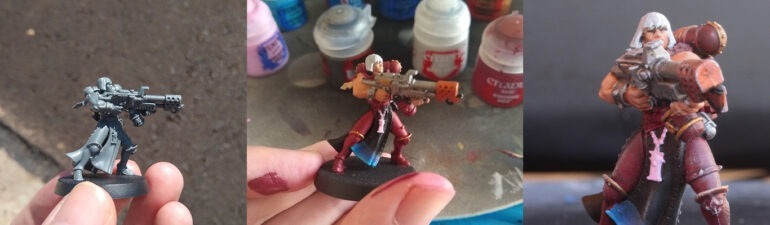
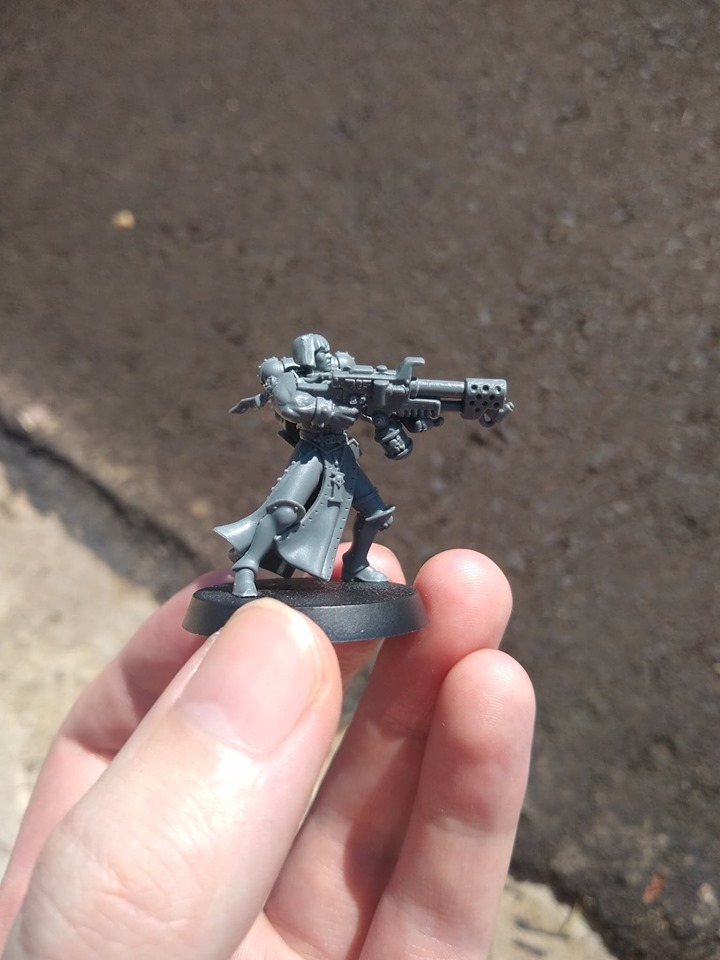
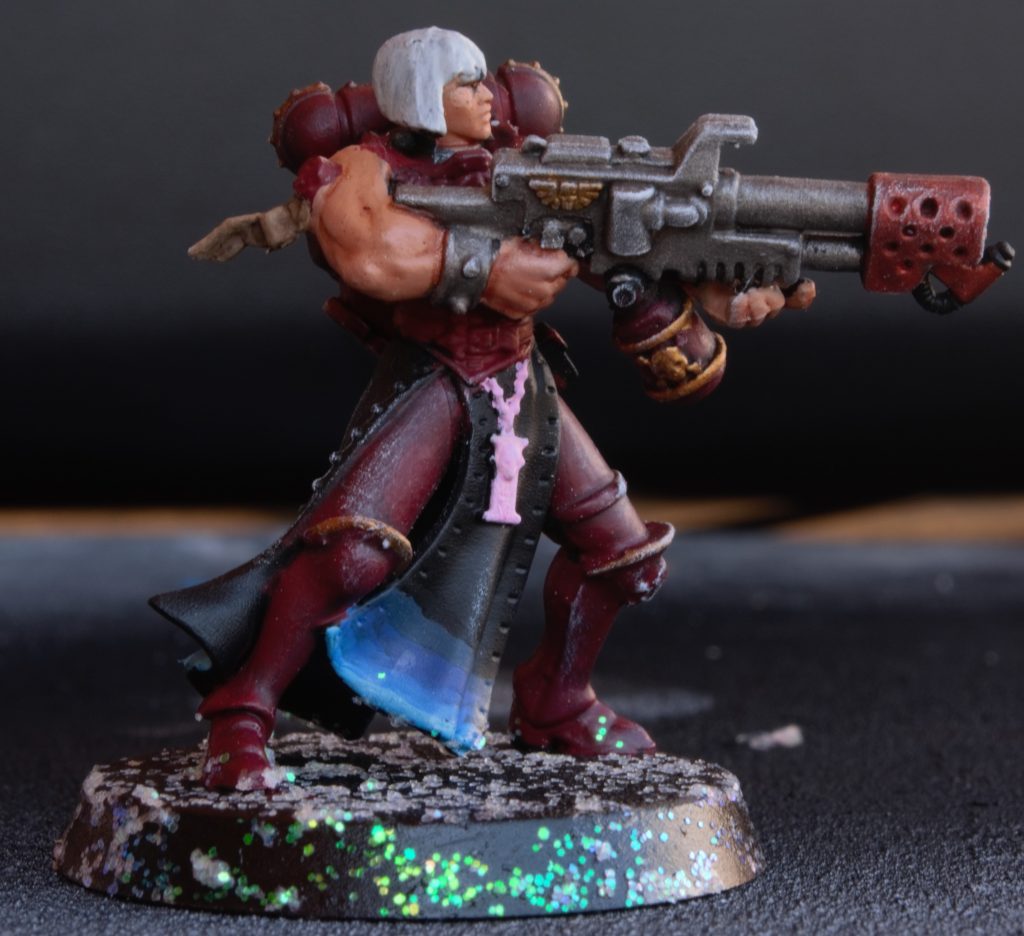
To help, I have this lovely Sister of Battle I plan to use in my Warhammer 40,000 Kill Team. I’ll go over kit-bashing later, but I did use some big, muscular arms for comedy reasons. This grey plastic is how most Games Workshop minis ship, and require some assembly.
Most hobbyists and I always suggest using a spray-on primer. Games Workshop, Army Painter, and Testors make great primers in a wide assortment of colors. If you plan to paint a large group of minis a particular color, I would suggest using a primer of that color. Otherwise, white or black works best. I like to use white if I am using bright colors. Black is less likely to show any mistakes. They will seem like shadows if you fail to get any paint in any nooks.

Brushes
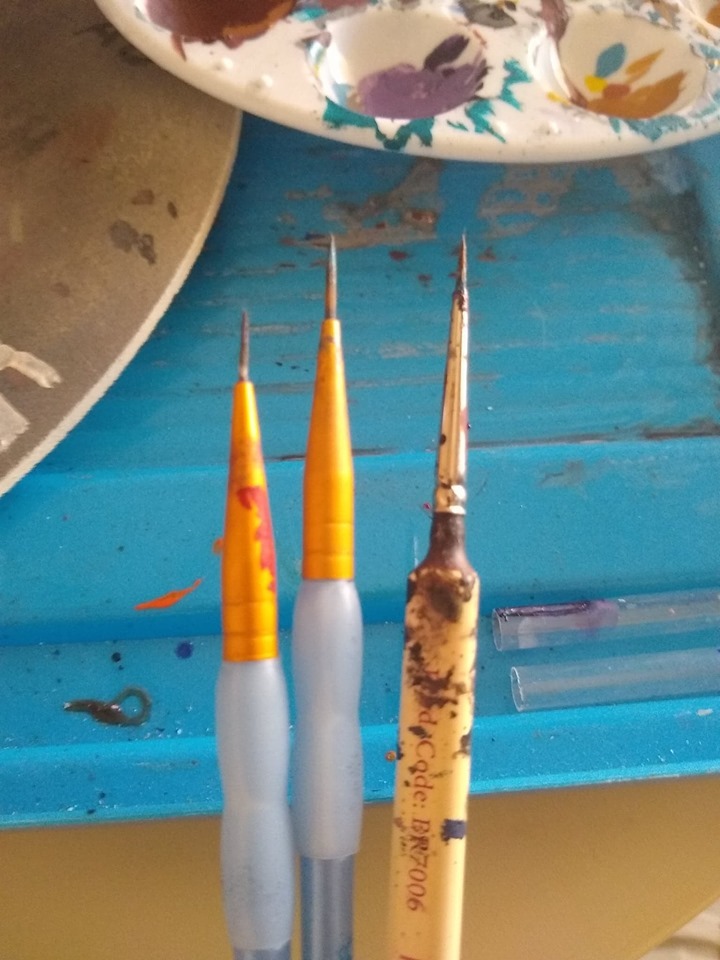
Now, let’s talk brushes. While I have picked up an assortment of brushes ranging from a 2-inch monstrosity that I have used once for a terrain piece to Armypainter’s “Psyco” brush, I mostly use the “Character” size brush. For fine details, I have some cheap brushes I picked up from a major hobby store for 5 bucks USD for a pack of 5. For this model, I use the three brushes in the picture below. If you’re painting your first miniature, I suggest going to your local retailer and finding the smallest brush set you can. I’d also get a cheap, plastic palette. Others swear by wet palettes, but again, article for later. Let’s stick to the basics.
Paints
For paints, acrylics are your friend. If you’re starting, anything will do. Cheap, one-dollar bottles from your retailer will work. Here in the US, that’s Americana and Apple Barrel. I still use these for large projects or where most of the paint will be wasted anyway, such as dry-brushing. Next, let’s get to actually painting. This step is base coating. Think of it as ‘Colour by Number’. You just want to get the colors where they’re needed. This is where I stopped on my first models, but we can go one step further.

A tip for edging is to use the side of your brush and take most of the paint off the brush before applying it. It’s kinda like dry brushing but not as subtle. This is probably the most time-consuming part. If you’re painting a whole squad at once, do this one color at a time, like an assembly line. I like to do the difficult parts, such as the faces, first.
Washing or Shading
Next is wash, or shading. This is where we add depth to our minis. At this stage, I also recommend getting clean water; the suspended acrylic pigment will muddy your wash. Unlike our primer and base coats that are acrylic, a wash is ink-based. They are very watery compared to our paints. This lets them flow. Apply that to your mini-like goblins in your dungeons. Once you get a better handle on painting, you can experiment with different types of washes. In this case, I always recommend GW’s “Nuln Oil’ for anything like armor and weapons and “Agrax Earthshade” or “Reikland Fleshtone” for the skin. Keep in mind these will knock the color down a shade on your minis. If you are painting a large, smooth model, I would not use a lot of shade except where there is a joint or texture, or the model will look splotchy.
Dry Brushing
Lastly, dry brushing. This is a make or break for the model. If you mess up here, it’s difficult to correct, so I have been known to skip this on my own minis. When you dry brush, I suggest a slightly larger brush and one that you don’t have any emotional investment in or is at the end of its life span. The trick is to get as much of the paint off the brush, usually on a paper towel or tissue, then gently flick it back and forth across any raised edges. This is most noticeable on the model’s gun in this sample.
That’s it! You’re done! Take glamour shots, show your friends, plot how you’ll kill them with your brand new dragon or beholder.
Dungeon Craft is an ongoing series that aims to improve all of our RPG and Tabletop gaming experiences. It features anything tabletop-related from miniatures to character-building toolkits.